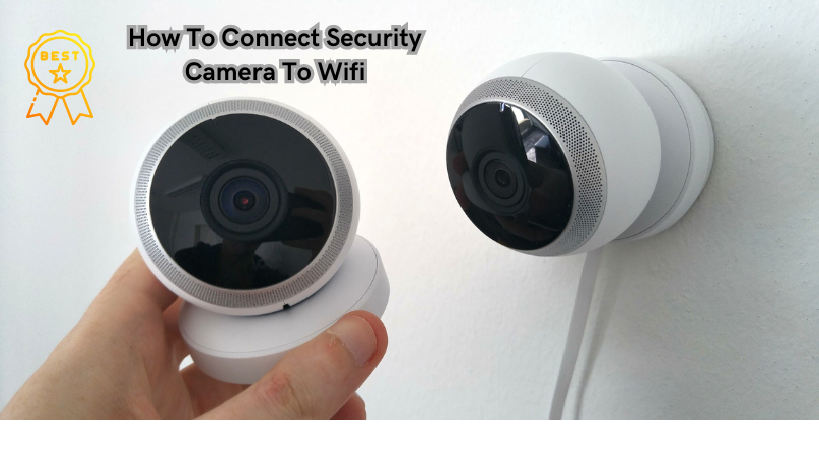
How To Connect Security Camera To Wifi? A security camera is an essential tool for modern homes and businesses, as it provides surveillance and peace of mind. With technological advancements, most security cameras now come with wireless connectivity options such as WiFi. This allows for easy setup and remote monitoring through a smartphone or computer.
However, connecting a security camera to WiFi can be a daunting task for many people.
In this guide, we will provide you with step-by-step instructions on how to connect your security camera to WiFi. Whether you are a beginner or an experienced user, this guide will help you set up and configure your security camera for remote access.
Preparing for Connection
Before you can connect your security camera to WiFi, there are a few things you need to do. First, make sure that your security camera has wireless capabilities and is compatible with WiFi networks. If not, you may need to purchase an adapter or upgrade to a newer model.
Next, determine the type of network connection your security camera supports – 2.4GHz or 5GHz. Most WiFi-enabled security cameras support the 2.4GHz frequency, but it’s essential to double-check.
Ensure that your WiFi network is stable and has a strong signal in the area where you plan to install your security camera. You may need to extend your WiFi range with a repeater or extender if there are connectivity issues.
Also, prepare any necessary equipment such as a power adapter, Ethernet cable, or USB drive for the setup process. Make sure to have your network name and password on hand.
Steps to Connect Security Camera to WiFi
There are several methods for connecting your security camera to WiFi, and the specific steps may vary depending on the brand and model. However, here is a general guide that you can follow:
Power on your security camera and make sure it is in setup mode.
The first and most crucial step is to power on your security camera and ensure that it is in setup mode. Most cameras have a designated setup button or switch, which you can press to initiate the process. If your camera does not have this feature, refer to the user manual for specific instructions.
It’s essential to start with this step as it ensures that the camera is ready for connection and eliminates any potential issues that may arise from incorrect setup. Once your camera is in setup mode, you can proceed with the next step of connecting it to your WiFi network. With a single press of a button or connect camera switch, you can begin the process of setting up your security camera for remote access and monitoring.
Use an Ethernet cable to connect
Connecting your security camera directly to your router using an Ethernet cable is necessary for the initial setup process. This step allows you to access the camera’s settings through a web browser on a computer or smartphone connected to the same network. It also ensures a stable and reliable connection, which is vital during the setup process.
Make sure to use an Ethernet cable that is long enough to reach from your router to the location where you plan to install your security camera. Once connected, you can proceed with accessing your router’s settings and locating the camera’s IP address for further configuration.
Using an Ethernet cable also eliminates potential connectivity issues that may arise when attempting to connect wirelessly. It is an essential step in the setup process that should not be skipped. Once you have successfully set up your security camera, you can disconnect the Ethernet cable and switch to wireless connectivity for remote access.
Log into your router’s settings
To access your router’s settings, you will need a computer or smartphone connected to the same network. Open a web browser and type in your router’s IP address, which is usually found on the back of the device. Once logged in, you can navigate to the DHCP client list to find the IP address assigned to your security camera.
This step is crucial as it allows you to locate the camera’s IP address and access its settings for further configuration. Make sure to have your network name and password on hand, as you may need them during this process.
Once you have successfully connected to your security camera through your router’s settings, you can proceed with following the on-screen instructions provided by the manufacturer to complete the setup process.
Once completed, you will have a successfully connected security camera that can be accessed remotely through your WiFi network.
Locate the DHCP client list
The DHCP client list is a list of all the devices connected to your router. This list displays their respective IP addresses, which are necessary for accessing each device’s settings. In this case, you will need to locate the IP address assigned to your security camera.
Once you have found the IP address, you can access it through a web browser and follow the manufacturer’s instructions to complete the setup process. This step is crucial as it allows you to establish a connection between your camera and your network.
If you are having trouble locating the DHCP client list or finding the IP address assigned to your security camera, refer to your router’s user manual for specific instructions.
Once you have connected your camera to your network, you can proceed with the next step of disconnecting the Ethernet cable and setting up wireless connectivity for remote access.
Access the IP address through a web browser
Once you have located the IP address assigned to your security camera, you can access it through a web browser on a computer or smartphone connected to the same network. This step allows you to enter into the camera’s settings and complete the setup process as instructed by the manufacturer.
Make sure to follow all instructions carefully and input any necessary information, such as your network name and password, to establish a successful connection. Once completed, you can disconnect the Ethernet cable from your security camera and switch to wireless connectivity for remote access.
In some cases, the IP address may not work directly in a web browser, and you may need to use specific software provided by the manufacturer to complete the setup process. Refer to the user manual or manufacturer’s website for further assistance.
Once connected, you can unplug the Ethernet cable
Once you have successfully completed the setup process and established a connection between your security camera and WiFi network, you can unplug the Ethernet cable. This step allows for wireless connectivity and eliminates any potential issues that may arise from using a wired connection.
Make sure to follow any additional instructions provided by the manufacturer to ensure a smooth transition from wired to wireless connectivity. Once disconnected, you can place your camera in its desired location, and it will continue to function as intended.
It’s essential to note that if you experience any connection issues after unplugging the Ethernet cable, you can always reconnect it for troubleshooting purposes. However, in most cases, a successful setup and connection should allow for uninterrupted remote access to your security camera.
Contact Kouland Technology, inc For your secutiry set up
If you are in need of professional secutiry set up, look no further than Kouland Technology, Inc. Our team of expert technicians are dedicated to providing top-notch service for all your security needs. From smart home installations to printer troubleshooting and repairs, we have you covered.
Our experienced technicians are trained to handle a variety of tech-related issues, including computer repair, setting up new equipment, and optimizing network connections. We also provide training to ensure you are fully comfortable with your new devices and systems.
At Kouland Technology, Inc., we understand that each customer’s needs are unique. That’s why we offer personalized solutions tailored to your specific situation. We are committed to providing fast, efficient, and reliable service at an affordable price.
Our Smart Security Cameras Installation Price $80.00 and can be completed in one visit. Simply select your camera brand, number of cameras, and desired installation date and time. Our technicians will come to your door equipped with all necessary tools and equipment to get the job done right.
At Kouland Technology, Inc., we are dedicated to your satisfaction. If you are not completely happy with our service, we will do whatever it takes to make it right. Our goal is to provide you with the best possible experience and ensure that your security systems are functioning at their optimal level.
So why wait? Call us 1(918)-704-7676 or visit our website to book your security camera setup today and enjoy peace of mind knowing your home or business is protected.
Benefits of Professional Security Camera Setup
While it is possible to set up your security camera on your own, there are significant benefits to hiring a professional for the job.
First and foremost, a professional technician has the knowledge and expertise needed to properly install and configure your security camera system. This ensures that everything is set up correctly and functioning as intended, giving you peace of mind knowing your property is protected.
Additionally, professional setup eliminates the risk of any potential mistakes or errors that could compromise the effectiveness of your security system. A technician can also provide valuable recommendations on camera placement and other security measures to optimize your setup. How To Connect Security Camera To Wifi?
Moreover, hiring a professional for security camera setup saves you time and effort. With their experience and specialized tools, they can complete the job efficiently, freeing up your time to focus on other tasks.
Lastly, professional setup often comes with a warranty or guarantee, providing additional assurance that your system will function properly. In case of any issues or malfunctions, you can rely on the technician to troubleshoot and resolve the problem promptly.
Can I Add More Cameras or Upgrade My System?
Yes, you can add more cameras or upgrade your system at any time. As technology continues to advance, newer and more advanced security camera systems are constantly being released. If you want to enhance your security measures, you can easily upgrade your existing system by adding more cameras or switching to a newer model with better features.
It’s essential to consult with a professional technician before making any changes or upgrades to your security camera system. They can provide valuable insights and recommendations on the best options for your specific needs and budget.
Also, keep in mind that adding more cameras or upgrading your system may require some adjustments to your network and settings. It’s always best to have a professional handle these changes to ensure they are done correctly and do not cause any connectivity issues.
Mistakes to Avoid
Setting up a security camera system may seem like a straightforward task, but there are some common mistakes that people make during the process. These include:
- Not properly securing the cameras: Make sure your cameras are securely mounted and cannot be easily tampered with or knocked over.
- Choosing the wrong type of camera for your needs: There are various types of security cameras available, each with its unique features and benefits. It’s essential to choose the right type for your specific security needs.
- Not considering lighting conditions: Different cameras have different capabilities in low light or night vision settings. Make sure to choose a camera that can effectively capture footage in the lighting conditions of your property.
- Neglecting network and connectivity requirements: Many modern security cameras require a stable network connection for remote viewing and recording. It’s crucial to ensure your network can support the camera’s needs before installation.
- Not setting up motion detection: Motion detection is an essential feature in security cameras, as it alerts you to any suspicious activity on your property. Make sure to properly set up this feature and adjust sensitivity levels for optimal performance.
By avoiding these common mistakes and opting for professional security camera setup, you can ensure that your system is functioning effectively and providing the necessary protection for your home or business. Don’t hesitate to contact Kouland Technology, Inc. for all your security needs and book a service appointment today!
FAQs
How do I initially set up wireless security cameras to my Wi-Fi network?
To set up wireless security cameras on your Wi-Fi network, first ensure your camera is powered on. Consult the camera’s user manual for specific instructions on accessing its settings. From there, select the Wi-Fi network option and enter your network details. For a smooth connection process, make sure you’re inputting the correct wifi settings.
Can I use any Wi-Fi router with my wifi cameras?
Most wifi cameras are designed to be compatible with a wide range of Wi-Fi routers. However, it’s essential to check the camera’s specifications or the camera’s user manual to ensure compatibility with your specific router model. Some cameras may require adjustments in the router’s settings, such as enabling a 2.4GHz band for the camera to connect.
How do I connect my wireless security camera directly to my smartphone?
To connect a wireless security camera to your smartphone, download the camera’s app from the App Store or Google Play Store. Create an account and select ‘add device’ within the app. Follow the instructions provided, which often involve scanning a QR code on the camera. Ensure your smartphone is connected to the same Wi-Fi network as the camera for a successful setup.
What is a static IP address, and do I need one for my wifi camera?
A static IP address is a fixed address assigned to your wifi camera, making it easier to access and manage over the network. While not always necessary, setting a static IP address for your camera can help prevent connection issues if the device reboots or if there’s a power outage. Consult your Wi-Fi router’s and camera’s user manuals for guidance on setting up a static IP address.
How can I ensure my wireless cameras maintain a strong connection to my Wi-Fi network?
To ensure your wireless cameras maintain a strong connection, place your Wi-Fi router centrally relative to the cameras’ locations. Avoid physical obstructions and sources of interference, like thick walls or other electronic devices. Regularly check your Wi-Fi settings to ensure optimal performance and consider using Wi-Fi extenders if cameras are located far from the router.
Are there special considerations for connecting multiple wireless security cameras to my Wi-Fi network?
When connecting multiple CCTV cameras to your Wi-Fi network, it’s crucial to ensure your network can handle the additional load. Check the bandwidth requirements of each camera and assess your network’s capacity. You might need to upgrade your Wi-Fi plan or add a dedicated network for your security system. Always refer to each camera’s user manual for specific instructions on integrating multiple units into your network efficiently.
Conclusion
In conclusion, professional security camera setup offers numerous benefits, including expert installation and configuration, time and effort savings, and warranties or guarantees for your system’s proper functioning. It’s essential to avoid common mistakes and consult with a professional technician before making any changes or upgrades to your system.
At Kouland Technology, Inc., we are committed to providing top-notch service and ensuring your satisfaction with our security services. Don’t hesitate to contact us for all your security camera needs and enjoy the peace of mind that comes with having a reliable and effective security system in place.